Proverbs 8:17
"I love those who love me; And those who diligently seek me will find me.
Showing posts with label CTMH Artiste Cricut Cartridge. Show all posts

Saturday, February 27, 2016

Birthday Gift Card Holder

Hi friends, thank you so much for stopping by this Saturday! Today I am sharing a super simply gift card holder using PCS Wish Big stamp set! This project would also be great to make for the "Ribbon Challenge" that Pretty Cute Stamps is having. Click HERE for more details!


I started out by cutting my gift card holder using CTMH Artiste Cartridge out of some #110 Neenah Solar White card stock and cut some pattern paper to wrapped it around my gift card holder. 

Taking a stitched circle die and some ink, I stamped the cake image from the Wish Big stamp set onto it and took the phrase "It's your birthday" and stamped that on top.


I also decided to decorate the inside with more pattern paper and another fabulous sentiment from the same stamp set! I finished off my gift card by adding some ribbon to help keep it closed!

Well that is all that I have for you today! Thank you so much for stopping by, I hope you have a fabulous day!

Saturday, February 20, 2016

Pretty Cute Stamps "Ribbon Challenge"

Happy Saturday friends!

Pretty Cute Stamps is having a fun challenge this month, "Ribbon Challenge" . Click HERE to get all the details and to link up your project!


So here is my project for this months challenge...


As you can see, I am trying to get a  head start on my teacher gifts for teacher appreciation week. I created this fun bag using Close to My Heart Artiste Cartridge (bag image on page 79) and used Pretty Cute Stamps Chick with Brains stamp set for my sweet Owl and the sentiment!  I love how the ribbon added the perfect finishing touch to my gift bag!

Well that is all that I have for you today! Don't forget to stop by the other design team members blogs to get more fabulous inspiration (click HERE to take you to Pretty Cute Stamps blog).


Here is the stamp set I used

Have a fabulous weekend!!

Thursday, November 5, 2015

Candy Bar Treat Boxes

Hi friends, today I am sharing this fun post over at The Crafty Pickle blog!

I'm currently working on a few items for an upcoming craft fair that I will be participating in. I shared this project last year in December, a step-by-step on how to make the box treat, but this time around I used my Cricut and a couple of the CTMH Cricut Cartridges to decorate my boxes.

Here are a couple that I've made so far...


I used the CTMH Artistry Cartridge to cut out my snowflakes out of some glitter card stock and added some foam dimensional to add a bit of dimension to them.


 I took the Treats of Friendship stamp set, also from Close to My Heart, to stamp the cute image on my tag.

The deer and the design behind the deer came from the CTMH Artistry Cartridge and the ornament was cut using the CTMH Artiste Cartridge. For the sentiment on the deer box, I used the CTMH Holiday Tags stamp set to add my sentiment.

I still have a few to finish, but I wanted to share the ones that were done and in case you were interested in the tutorial click HERE to read that post.

Thanks so much for stopping by, I hope you have a fabulous day!


Wednesday, October 14, 2015

"Oh Happy Day" CTMH Cricut Artiste Collection

Hi friends, thank you so much for stopping by!

Today I am sharing this card over at The Crafty Pickle blog and I would love if you could stop by their blog to check out other projects from the other Design Team Members.

As you may know, I own 4 out of 5 of the Cricut Collections that Close to My Heart offers. I absolutely love them. So with that being said I took one of the stamp sets from the Cricut Artiste Collection to create my card!


I started out with stamping and masking some balloons onto my front panel using CTMH Inks in colors Lagoon, Cotton Candy, and Honey and stamped the balloon strings using the same stamp set with some CTMH Black Ink.

Using the same stamp set from the Cricut Artiste Collection, I took one of the sentiments and stamped it with some Honey Ink and used my scissors to cut it out, there is an image on this cartridge that will cut this banner.


Before gluing my top panel to the base of my card, I took an older CTMH stamp set One Way Border and stamped one of the images multiple times with Black Ink to create a background. I finished it off by gluing my top panel down and gluing some TCP Relish Mix to my card.

Hope you enjoyed and thank you so much for stopping by! Have a fabulous day!

Supplies used
CTMH Inks Lagoon, Cotton Candy, Honey, Black
CTMH stamp set One Way Border 


Friday, August 7, 2015

Birthday Treat Bag

Hi friends! Happy Friday!!

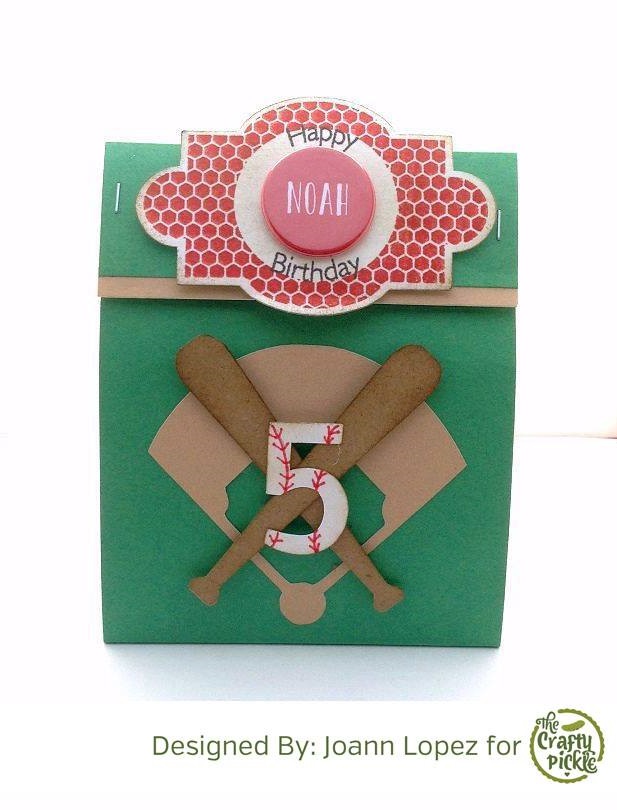
I'm sharing a Birthday Treat Bag over at TCP Blog. Please feel free to stop by and see the list of supplies that I to create it!


Thanks so much for stopping by!

Thursday, July 16, 2015

Christmas in July: Tags

Happy Thursday friends!

I shared a Christmas card with you last week and today I am sharing some Christmas tags! It's never too early to think about Christmas, at least for me, the sooner I get things done the better as my little one's birthday falls 13 days before Christmas!!


I used the CTMH Artiste Cartridge to cut my tags (pg. 69) and bows (pg. 55).  I added some TCP Green Patterned Pop Flair and TCP Red Patterned Pop Flair to the center of my bows and stamped a small sentiment using the CTMH Countdown stamp set with StazOn. To finished my card I added some ribbon and TCP Jolly Holiday Relish Mix.  

These were so fun and super easy to make (especially the bow, it came together super fast)! Thanks so much for stopping by!

Supplies used
CTMH cardstock: Cranberry, Pear


Friday, July 10, 2015

FlairTastic Friday

Happy Friday and welcome to another TCP FlairTastic Friday! This Friday we are showcasing TCP Flair on greeting cards!

Here is my take on my card...


I started by stamping out a few arrow images from one of the stamp sets that comes with the CTMH Cricut Artiste Collection with some Honey, Sunset, and Pacifica Ink. I then layered a piece of vellum on top and stamped the "hello" speech bubble (same stamp set) with some Black StazOn.

I finished the card simply by adding a TCP Orange Patterned Flair, twine and TCP Something Shiny Sequins.

Please stop by TCP blog to view the other amazing projects from the design team! As always have a FABULOUS weekend!

Supplies used
CTMH Ink- Honey, Sunset, Pacifica

Monday, July 6, 2015

Father's Day gift

Happy Monday!

I forgot to share this post, so it's a super late Father's Day post! I made this for my husband and I loved it so much that I had to share it with you!


For my card, I used the SSS Medium Dots Stencil with some Wendy Vecchi embossing paste in which I added some SSS Inks (Maliblue, Doll Pink, Goldenlocks) to match the colors of the paper that I used for my candy tin.


I used the MME Up and Away Paper Pack to wrap my nuggets and my tin. I also used the CTMH Artiste Cartridge to cut my rosette and used the Perfect Fit-Dad Holiday stamp set from CTMH for my sentiment.

That is all and thanks for stopping by! Have a super Fabulous day!

Supplies used
MME Up and Away Paper Pack

Thursday, July 2, 2015

Wedding card

Happy Thursday!

Today, I am sharing a wedding card that I made for TCP Blog using the CTMH Cricut Artiste Cartridge!


When this cartridge came out I fell in love with it. It has so many great cuts, which include tons of 3D items, boxes, labels, cards with envelopes, phrases and much more (check out the handbook here).  I cut the frame (pg. 60) and the phrase (pg. 61) from the CTMH Artiste Cartridge.

I cut both images twice, once out of black and once out of a light grey cardstock to help add a little shadow. I also cut a few stripes of pattern paper to add to the left side of the card and a stripe of CTMH Cotton Candy cardstock to help add some color.


I finished my card by adding a heart flair from TCP Watercolor Hearts and some TCP Something Shiny sequins.

That is my card for today, thank you so much for stopping by! Don't forget to stop by the shop to take a look and pick up some goodies!

Supplies used

Friday, June 26, 2015

FlairTastic Friday

Hi friends! So HAPPY you have stopped by!

The Crafty Pickle has a fun new blog feature in which we are showing a fun way to use some awesome flair! So with that being said our first feature is "Gifts"!


There are many ways of using flair when you are gift wrapping a present. Maybe like using it as an embellishment on a tag or simply using it to embellish your focal point, for instance like I did. In this case I wanted to make my flair the focal point and personalize it with a small sentiment!

I simply took some Black StazOn ink and stamped a sentiment on my Yellow Patterned Flair to customize it! That's the beauty of these Color Pop Flair, they have a beautiful background and you can stamp anything you like on them to fit your projects!


I also used the CTMH Artiste Cricut Cartridge to cut out my cute little box from some Cashmere Cardstock and my flower using Gypsy and Pear Cardstock . I used the Countdown stamp set to stamp my background on my box, some Thistle Extra Thick Twine to wrap around and some sequins from the Spring Fling mix to finish off my card!

Thanks again for stopping by, have a fabulous day and weekend!

Supplies used
CTMH Cardstock Cashmere, Gypsy, Pear
CTMH Stamp Countdown

Friday, June 12, 2015

"World's Greatest Dad"

Happy Friday, thank you so much for stopping by! With Father's Day just a few days away, I decided to share a special "Dad" card with you!

Here it is...


I kept it super simple. I started off by cutting 3 tie's using the CTMH Artiste Cricut Cartridge out of some CTMH White Daisy card stock with my cricut. I then stamped a coordinating tie image from the Perfect Fit-Dad Holiday stamp set with some Lagoon and Honey Ink.

Using the same stamp set I stamped "World's Greatest" on a 2 inch circle piece of vellum with some Versa Mark and used some black embossing powder and then placed a flair from TCP Family themed flair set right in the center. I finished the card by adding some foam adhesive to the tie's and drew a white square to add a little something.


Hope you enjoyed today's card, and as always thanks for stopping by and have a FABULOUS day!

Supplies used
CTMH stamp set - Perfect Fit-Dad Holiday
CTMH Inks- Lagoon, Honey

Wednesday, March 18, 2015

Baby Shower Favor

Hi Joann here today, thanks for joining me!

Today I am sharing a cute little baby shower favor that I made using the CTMH Artiste Cartridge!


Isn't this box adorable and wouldn't it also be great as an Easter Box to fill with treats for kids?!?!  To decorate my box I cut a 1 3/4 circle stamped an image using the CTMH-Holiday Tags stamp set and customized it with the due date using YES Months set for my month and finished it off with some scattered sequins.

Hope you enjoyed and thanks for stopping by!

Supplies Used

Thursday, March 5, 2015

"Thanks"

Hi and thanks for stopping by! Today I have a quick and easy thank you card using the CTMH Artiste Cartridge.


I cut several of the diamond image (pg. 49) out of some different colored card stock and clear embossed a few of them using the Honeycomb Flair to add some texture. I randomly placed them to create a fun background for my card. I then cut "Thanks" (pg. 65) for my sentiment, 4 times and stacked them on top of one another to add dimension and placed it on top of  the banner (pg. 35) in which was cut from vellum.


I finished off my card by adding a few adhesive pearls. That's it, hope you liked it and as always, thanks for stopping by!

Don't forget to check out TCP Close to My Heart page!

Supplies used:

Friday, January 16, 2015

Valentine Treats #1 (My First Giveaway)

Hi and thanks for stopping by!

With Valentine's Day coming up, I thought that it would be a great idea to get a head start and share with you some fun and inexpensive treat gift ideas. I'm turning this into a mini series, so stay tuned for some fun and cute ideas!

Here is my creation...


I cut these adorable pillow boxes using the CTMH Art Philosophy Cartridge out of transparency sheets (image on pg 28) at 5 inches. I scored all the areas that needed to be scored and placed scor tape to close my box. I also used the CTMH Artiste and CTMH Artbooking Cartridges to cut my labels. I used the coordinating stamp set that came with the Artbooking collection for the base of my labels and Holiday Tags Occasions stamp set for the center and sentiments.

Finally, I filled them up with Hershey Chocolate Kisses and wrapped then tied some ribbon to secure the pillow box closed. I used a glue dot to place my labels on the treats, finishing them off with some bling.

I hope you enjoyed today's post and as I stated, I'm having my first giveaway! I'm super stoked with having a little over 40 likes on my FB page, so thank you to everyone that has liked my page and to those special crafters who follow me on my blog! I am giving away 6 of these awesome pillow box treats, more details below.


**To enter into the giveaway please be a follower of my blog and/or facebook page and comment here to let me know you follow. You will get an additional entry if you are a follower of both my blog and FB Page and a 3rd one if you invited friends to check out my page and like it. I will choose the winner on Monday! Good luck and thanks again!**

Supplies used

Wednesday, December 3, 2014

Candy Bar Treat Holder

Hi! Today I have fun little project to share with you today and my first ever step by step tutorial (so this is a warning that it is a LONG post, lol)!

I wanted to create some fun treat holders to give to a few friends and family some in which I could fit a snicker bar. I searched for a few ideas and came across many (pinterest of course, lol) and most of them used the envelope punch board, but I wanted to be able to make one without the punch board.

Here is what I came up with...


I started off with cutting some 12 x 12 Cranberry card stock from CTMH at 9 1/4 x 5 (you can get 2 treat holders out of a 12 x 12). I then placed my card stock long ways on my scoreboard (9 1/4) and scored it at 1 1/8, 2 1/8, 7, 8. I then took my card stock and rotated it (5) and scored at 3/4, 1 7/8, 3 1/8, 4 1/8.  It will look like this...


Taking my scissors I started to cut (black lines indicate where you need to cut and the "x" indicates the areas that will be removed).

You will then be left with this (I marked the 4 areas with stars for the next step below)...


The 4 squares with the stars (shown above) will need a small diagonal cut off of 2 sides (picture on the left). After all four squares have been cut, your treat holder should look like the picture on the right. This will help with the closure of the box.


I used my grid mat to place small dots on the top and bottom squares of my treat box (picture on the right). I took my scissors and meet the side dots to the top. You should end up with the picture on the left.
I took CTMH stamp set Snowflakes to stamp a few images for my box and turned the box on its back and placed some strong adhesive on the 3/4 side (one of the sides is slightly smaller than the other, I did it this way so when the box is closed, the closing on the back is down the middle and not to one side).


I found the easiest way to line everything up was to fold the box and carefully push down so both sides stick to the adhesive and then I opened it to run my finger inside, making sure it was secured.


I cut an image from the CTMH Artiste that coordinates with the Holiday Tags CTMH stamp set and stamped it with some Cranberry Ink and placed a TCP December Flair in the center (the glitter on this flair is stunning). Punched a hole on top and ran both ends through it so I could tie a nice bow on top of the tag.


I know this was a lengthy post but once you get one done, I promise the others will be super fast. I appreciate you making it to the end and I hope you enjoyed my first tutorial.

Just a heads up...
The Crafty Pickle is in the process of opening a new shop so please stay tuned for more info or follow on facebook The Crafty Pickle.

The Crafty Pickle etsy shop is back open!

Thanks for stopping by.

Supplies used:

Tuesday, November 18, 2014

Thanksgiving Gift Idea

Hi crafty friends, so happy you have stopped by!

If you stopped by my blog a few days ago, I shared with you all that I participated in a couple of Christmas craft fairs! It was my first time, and let me tell you, it was an awesome experience. I met a lot of people and actually made a few friends!

So with that said, I am sharing with you my first The Crafty Pickle Design Team post! I had a few nugget tins left over from my fairs (8 to be exact, lol) and I thought that I could redesign them for a few Thanksgiving gifts for a few family members and friends!


I used both CTMH Cartridges (Artiste and Art Philosophy) to cut all of my leaves at 2 inches and used some watercolors to give them so color. I wrapped my nugget tin with some craft paper (cutting that at 2 inches) and tied some brown twine. I then glued all of my leaves down and added some TCP November Flair to the center where all of my leaves met and finished it off with some fabulous TCP Autumn Sequins Mix! Hope you enjoyed my gift idea!


Thanks for stopping by, and don't forget to stop by the The Crafty Pickle Etsy Shop for some awesome goodies!

Supplies used:
Watercolor Paper
Brown Twine
Watercolors

Monday, November 17, 2014

TCP Blog Hop


Welcome to The Crafty Pickle blog hop!

Today our creative team will be sharing with you ideas on using Flair, Sequins, Close To My Heart stamps, and more.

Make sure you leave a comment on each blog as you hop along for extra chances at winning some fabulous prizes. You have until Friday November 21st to comment and winners will be announced on Monday November 24th!

Prepare to be inspired by our awesome, creative crafty pickle team!

If you are coming from Elodie's Blog, then you are in the right place! If not click HERE to take you to the beginning of an awesome blog hop!

First off, thank you for joining us and we hope you are having fun! With Thanksgiving totally being next week I thought a card would be nice to share with you (there is still time to mail one, lol)!


I started by creating my own rosette simply by cutting a strip of CTMH Cranberry Cardstock at 2 1/2 inches and used a border punch to one side and scored between each scallop. I used the CTMH Cricut Artiste Cartridge to cut the middle design at 1 3/4 and stamped it with a matching CTMH stamp set "Holiday Tags" using CTMH Sunset Ink Pad and topped it off with some TCP November Flair. Using the same stamp set I stamped my sentiment with some CTMH Cocoa Ink.

I finished my card with some brown twine and added some beautiful TCP Autumn Sequins Mix! 


I hope you enjoyed my card!

Supplies Used:

Thanks for visiting. Next up on the blog hop is Julia!

If you get lost along the way here is the order of the hop.

Alicia http://www.sassycardsbyalicia.blogspot.com/
Carrie http://carrieshappyscrappin.blogspot.com/
Catherine http://catherinegmartin.blogspot.ca/
Elodie http://scrapydoo.canalblog.com/
Joann http://jlopezdesigns.blogspot.com/
Julia http://monjolibricolage.blogspot.ru/
Kristen http://memoriesbythepageful-kristin.blogspot.com/
Monika http://www.made-by-monalisa.blogspot.com/
Stephanie http://www.stephanie-eaken.blogspot.com/
Treasa http://www.popdotsandlollilops.blogspot.com/

And don’t forget to go back to The Crafty Pickle blog when you’re done and comment there too! 

That’s 11 chances to win!


Happy Hopping!