Proverbs 8:17
"I love those who love me; And those who diligently seek me will find me.

Saturday, December 19, 2015

"Anything Goes" December Pretty Cute Stamps Challenge

Happy Saturday friends, thank you so much for stopping by!


Today I would like to share a fun gift idea for those of you who are last minute like me...lol!  I came across this tutorial and absolutely feel in love with the project. 

Here is my take...


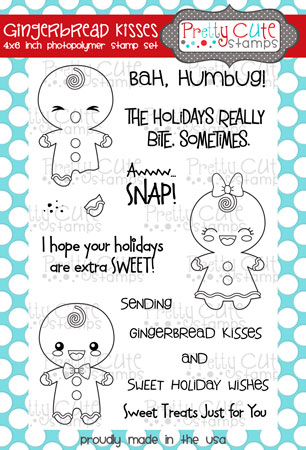
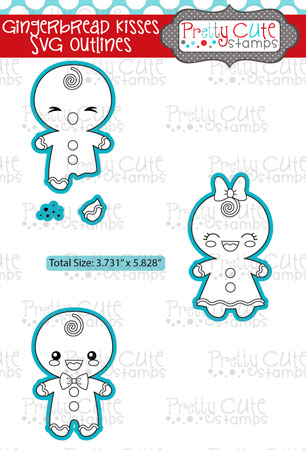
This adorable box holds a gift card and some candy! I used Pretty Cute Stamps Gingerbread Kisses for my sentiment and my adorable image.


Now the box was made to hold 10 Hershey Nuggets, but at the last minute I placed Hershey Kisses inside because I thought it went PERFECT with my sentiment.  So the next time I make this box I will need to make the box a little deeper. Still worked great and I love the way it came out but that would definitely be one change that I would need to make.

Well that is all I have for you today, have a fabulous weekend!

Stamp Set/SVG used


Thursday, December 10, 2015

Pretty Cute Stamps December 2015 Stamp Release Blog Hop

Happy Thursday and welcome to the Pretty Cute Stamps December 2015 Stamp Release blog hop! If you came here from Gloria's blog, you are in the right place. If you stumbled upon this post and would like to start from the beginning, please visit the Pretty Cute Stamps Blog.

The new release is AVAILABLE NOW and on sale until December 15, 2015. You can save even more by purchasing the December 2015 Stamp Release Bundle. Click HERE to pick up this awesome deal!

Now let's get started! I decided to make a Christmas card for my hubby using the new stamps sets.


 I started out by using my Cricut to cut my little coffee cups using the PCS Coffee Faces SVG Oulines. I then took PCS Coffee Faces stamp set to stamp one of my images and as for the other one, since I mirrored it I stamped it onto some acetate and used a technique called "reverse image stamping". Now the outcome will not be perfect so I took a ZIG Millennium .05 pen to trace over the "stamped image". I also added the adorable faces using PCS Coffee Faces!

(the pink cup is the reversed stamped image)

After that, I simply used my ZIG Clean Color Real Brush Markers in colors, 026, 025, 036, 031, 091, 062, 065 to color in my images. I took my sentiment from the PCS Coffee Sentiments stamp set and stamped it to a separate piece of white card stock, layering to the top panel.


I finished off my card by adding a mistletoe with some pearls, Wink of Stella to my cups and scattered some TCP Rock Candy Relish ( I absolutely LOVE the variety of sizes you get in this mix).

Well that's all I have for you today, thanks so much for stopping by. Your next stop is KARLA!

Before I let you go, please don't forget about about the GIVEAWAY and a FREE cut file!


One lucky hopper will win a $15 Gift Certificate to the Pretty Cute Stamps Store!  Here's what you need to do for a chance to win this Gift Certificate:

1. Leave a comment at EACH blog along the hop on each day.  Be sure to leave us a way to get in contact with you if you win.

That's all you have to do.  If you would like EXTRA entries, you can also do one or more of the following:

2.  Like the Pretty Cute Stamps Facebook Page.  Leave us a separate comment on this blog saying you did. (The separate comment is your extra entry.)

3.  Sign up for the Pretty Cute Stamps Mailing List and leave a comment on this blog saying you did.  You'll get occasional emails telling you about new releases, sales, coupon codes, and events. (The separate comment is your extra entry.)

A random winner will be chosen on Monday, December 14, 2015.

 Here is today's freebie..
Mug Gift Card Holder Cutting Files

Wednesday, December 9, 2015

Pretty Cute Stamps December 2015 Day 1 Sneak Peeks

Happy Wednesday crafty friends! Thank you so much for stopping by! 

Today we are sharing sneak peeks for Pretty Cute Stamps December 2015 stamp release!

Here is my peek at one of the new stamp sets...


I ADORE all of the images in this new stamp set and I hope you do as well! Don't forget to stop by Pretty Cute stamps blog to check out other peeks from the December 2015 release!


Don't forget to pick up today's freebie, today only!


Have a fabulous day!


Saturday, November 21, 2015

Pretty Cute Stamps "Gift Giving" Challenge

Happy Saturday friends!! So glad that you have stopped by today!

Today I am sharing a card with you that I made for the Pretty Cute Stamps "Gift Giving" Challenge. You can click HERE to get all of the details on how to enter your project and a chance to win a $15 Gift Certificate!

Here are my projects for today...


Last Saturday, I shared a post about these tags, you can see that post HERE. I've had these cute little boxes in my stash for a while now and thought that these tags would look perfect with them. I just took my box and wrapped it with some white tulle and attached my tag to it.  Super simple and such a great way to fancy up a simple box.

Now for my next gift idea, I created a box from some card stock to hold any full size candy bar. I stuck a Snicker bar inside of mine, but really any candy bar will fit. I have an older post about how I made these treat boxes and if you are interested, you can see that HERE.


I made a couple for Thanksgiving and some for Christmas. I used Pretty Cute Stamps Gingerbread Kisses and Turkey Time for my sentiments. These will make a really great, simple and fun gift to give to co-workers, friends, family, neighbors, etc.


Well that is all for today, hope you enjoyed today's projects. Have a fabulous weekend!


Friday, November 13, 2015

Hi crafty friends! Thank you so much for joining us for Pretty Cute Stamps November 2015 Release Blog Hop! If you came here from Debbie's blog than you are in the right place. If you stumbled upon this post and would like to start from the beginning, please visit the Pretty Cute Stamps Blog .

So let's get started...

Today's card is a one that I made for my son. He is 5 and has been begging me for a dog and let me tell you, this is the closest that he will get to having one, lol (I'll let him have one when he gets older, just not now)!  As you can see, I kept it SUPER simple. I used the Fur Baby stamp set for my sentiment and used my Cricut to cut out my card!

Can you believe I am done, this is probably one of the fastest and easiest card I have ever made! Next up is Janna!!

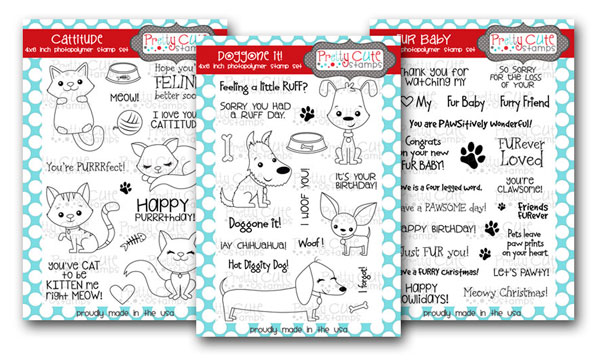
Here is a look at the stamp set I used on today's card! It is full of some cute sentiments and can be paired up with so many images and stamp sets! It's an adorable set to have!


 And here is a quick look at the November 2015 Release! Can I say ADORABLE!!

And before I let you go, please don't forget about about the GIVEAWAY and a FREE cut file!


One lucky hopper will win a $15 Gift Certificate to the Pretty Cute Stamps Store!  Here's what you need to do for a chance to win this Gift Certificate:

1. Leave a comment at EACH blog along the hop on each day.  Be sure to leave us a way to get in contact with you if you win.

That's all you have to do.  If you would like EXTRA entries, you can also do one or more of the following:

2.  Like the Pretty Cute Stamps Facebook Page.  Leave us a separate comment on this blog saying you did. (The separate comment is your extra entry.)

3.  Sign up for the Pretty Cute Stamps Mailing List and leave a comment on this blog saying you did.  You'll get occasional emails telling you about new releases, sales, coupon codes, and events. (The separate comment is your extra entry.)

A random winner will be chosen on Monday, November  16, 2015.

 Here is today's freebie...


Thursday, November 12, 2015

Pretty Cute Stamps November 2015 Day 2 Sneak Peeks

Hi crafty friends, thank you so much for stopping by!


Today is Day 2 of Pretty Cute Stamps November 2015 release and I am showcasing the Fur Baby stamp set! 

Here is my peek...


This stamp set is full of the cutest sentiments and paw prints!


Well I hope this sneak peek teased you a bit, lol! Make sure to stop by Pretty Cute Stamps Blog to check out the other peeks from our design team!

Don't forget to pick up today's freebie and join us tomorrow for our Blog Hop!


Have a fabulous day!


Thursday, November 5, 2015

Candy Bar Treat Boxes

Hi friends, today I am sharing this fun post over at The Crafty Pickle blog!

I'm currently working on a few items for an upcoming craft fair that I will be participating in. I shared this project last year in December, a step-by-step on how to make the box treat, but this time around I used my Cricut and a couple of the CTMH Cricut Cartridges to decorate my boxes.

Here are a couple that I've made so far...


I used the CTMH Artistry Cartridge to cut out my snowflakes out of some glitter card stock and added some foam dimensional to add a bit of dimension to them.


 I took the Treats of Friendship stamp set, also from Close to My Heart, to stamp the cute image on my tag.

The deer and the design behind the deer came from the CTMH Artistry Cartridge and the ornament was cut using the CTMH Artiste Cartridge. For the sentiment on the deer box, I used the CTMH Holiday Tags stamp set to add my sentiment.

I still have a few to finish, but I wanted to share the ones that were done and in case you were interested in the tutorial click HERE to read that post.

Thanks so much for stopping by, I hope you have a fabulous day!


Tuesday, October 27, 2015

"Happy Birthday" CTMH Build-a-Cake

Hi friends! Today I am  this birthday card over at The Crafty Pickle Blog. I used the Close to My Heart "Build-a-Cake" stamp set to create it!


I started off my stamping my cake image using CTMH Inks in colors Black, Honey and Cotton Candy! I did want to point out that the top layer image of my cake is part of the stamp set (the original image has some flowers, but after I stamped my image I took a blending pen and some of the Cotton Candy ink and filled those flowers in to give me a polka dotted cake layer). I then took a black gel pen to outline my cake and add some small details to my flower on top and simply layered my top panel to some pattern paper.

I completed my card by stamping my sentiment onto some vellum and adhered both my sentiment and some AWESOME TCP Relish Mix to my card. I know in the first picture my top left sequins look a bit purple but it's actually pink, I think my light was hitting it a bit too much, but you can see the pink in the second photo a lot better.


Well that is all for today, thank you so much for stopping by! Have a fabulous day!

Here is a look at the stamp set I used!


Tuesday, October 20, 2015

"Grateful for You" CTMH Cricut Artistry Cartridge

Happy Tuesday, friends! Today I am sharing this card over at The Crafty Pickle blog. I used Close to My Heart Cricut Artistry Cartridge to create it.

Here is my simple card for today...


This cartridge seriously has some fabulous cut designs! I used the image on page 45 in the handbook to create my card with my Cricut. I started out by placing a 4 x 5 1/4 rectangle on my screen and placed the solid image (pg. 45 ) right in the center. I then hit the slice button to cut the image out, I used some CTMH Cardstock (this exact pattern is the retired one, but you could definitely pick up the new patterns HERE) to use as my top panel. I also cut the coordinating "Grateful For You" image from the same page out of some brown card stock.


I then took my card base and placed my top panel on top and traced my image to it to cut it out with a craft knife, I did this because I wanted to add some acetate to see through the card. So when I was done with that I glued my acetate piece to my card base then layered my top panel and finally glued my "Grateful For You" image right in the center.

I finished my card by gluing some TCP Relish Mix and added some Wink of Stella glitter to my image. Super simple card but I really like the way it turned out! It's also a great card to make multiples of if you need several because of the simplicity of it.

Well thanks so much for stopping by, have a FABULOUS day!!


Saturday, October 17, 2015

Pretty Cute Stamps "Thank You" Challenge

Happy Saturday friends! Thank you so much for stopping by!

Today I am sharing a card that I made for Pretty Cute Stamps "Thank You" Challenge. Click HERE to get all of the details on how to enter your project and a chance to win a $15 Gift Certificate!

Here is my card...


I'm in love with "The Write Stuff" stamp set from Pretty Cute Stamps. There are so many adorable images and the sentiments are fabulous too! I used my Cricut to cut my globe out from The Write Stuff SVG Cut file from some watercolor paper and used my watercolors to color it in.

I took some TCP Heart washi tape placed it on my top card panel and stamped my sentiment from the same stamp set and placed it slightly above my washi. I placed some foam adhesive behind the globe and tied a little silver thread to the bottom to add a bit more interest. 

I finished off my card by placing my top panel to a grey card base to match the stand of my globe and scattered some TCP Relish Mix.

Here is the stamp set I used


Thanks so much for stopping by, have a fabulous day!!

Wednesday, October 14, 2015

"Oh Happy Day" CTMH Cricut Artiste Collection

Hi friends, thank you so much for stopping by!

Today I am sharing this card over at The Crafty Pickle blog and I would love if you could stop by their blog to check out other projects from the other Design Team Members.

As you may know, I own 4 out of 5 of the Cricut Collections that Close to My Heart offers. I absolutely love them. So with that being said I took one of the stamp sets from the Cricut Artiste Collection to create my card!


I started out with stamping and masking some balloons onto my front panel using CTMH Inks in colors Lagoon, Cotton Candy, and Honey and stamped the balloon strings using the same stamp set with some CTMH Black Ink.

Using the same stamp set from the Cricut Artiste Collection, I took one of the sentiments and stamped it with some Honey Ink and used my scissors to cut it out, there is an image on this cartridge that will cut this banner.


Before gluing my top panel to the base of my card, I took an older CTMH stamp set One Way Border and stamped one of the images multiple times with Black Ink to create a background. I finished it off by gluing my top panel down and gluing some TCP Relish Mix to my card.

Hope you enjoyed and thank you so much for stopping by! Have a fabulous day!

Supplies used
CTMH Inks LagoonCotton CandyHoneyBlack
CTMH stamp set One Way Border 


Thursday, October 8, 2015

Pretty Cute Stamps October 2015 Stamp Release Blog Hop Day1

Hi friends, today is Day 1 of the Pretty Cute Stamps October 2015 Stamp Release Blog Hop and if you came here from Melissa's Blog than you are in the right place. If you stumbled upon this post and would like to start from the beginning, please visit the Pretty Cute Stamps Blog .

So let's get started! Here is a quick look at the October 2015 Release that is available NOW and on sale until October 13, 2015!

I used my Cricut Explore to create my shaker card. I started out by placing a 5 1/4 x 4 rectangle on my screen, I then took another rectangle and sized it to where it would fit and touch the very edge of my Cool Chick SVG Outline. I took the smaller rectangle and placed it right in the center of my 5 1/4 x 4 rectangle, leaving me a framed rectangle. I then took my Cool Chick Outline and placed it inside my frame and when I had it in the right position I hit the weld button.


I stamped the image using the Cool Chick stamp set with some VersaFine ink and used my Zig Clean Color Real Brush (No. 22, 70, 52, 41) to color in my image. I added some dimension to his hat by using Snow Marker. I took one of the sentiments also from Cool Chick and created a border around my image.


I finished my card by adding a few TCP Relish mix inside my card and scattered just a few outside my card.  I really like the way this card turned out! 

Well thanks for stopping by, I am your last stop! So now go on over Pretty Cute Stamps store and pick you up some of these adorable stamp sets!!


Before I let you go, please don't forget about about the GIVEAWAY and a FREE cut file!


One lucky hopper will win a $15 Gift Certificate to the Pretty Cute Stamps Store!  Here's what you need to do for a chance to win this Gift Certificate:

1. Leave a comment at EACH blog along the hop on each day.  Be sure to leave us a way to get in contact with you if you win.

That's all you have to do.  If you would like EXTRA entries, you can also do one or more of the following:

2.  Like the Pretty Cute Stamps Facebook Page.  Leave us a separate comment on this blog saying you did. (The separate comment is your extra entry.)

3.  Sign up for the Pretty Cute Stamps Mailing List and leave a comment on this blog saying you did.  You'll get occasional emails telling you about new releases, sales, coupon codes, and events. (The separate comment is your extra entry.)

A random winner will be chosen on Monday, October 12, 2015.

 Here is today's freebie...

Monday, October 5, 2015

Pretty Cute Stamps October 2015 Sneak Peeks

Happy Monday friends! Thank you so much for stopping by!


Today is Day 1 of Pretty Cute Stamps October 2015 release and I get to share a peek of the new Nativity 2 stamp set!! This set my friends has some of the cutest images ever and the sentiments are PERFECTION!!

Here is my peek...


I created a fun little scene using some distress inks, masking a few images and colored them in using my Zig Clean Color Real Brush marker. I forgot to leave some room at the top for my sentiment, so instead of recreating my card I embossed a star with some white embossing powder and stamped my sentiment onto the inside of my card.


Look how beautiful this sentiment is...I love it!!

Well that is all for today's sneak peek, I hope you enjoyed it! Please stop by Pretty Cute Stamps blog to see some of the other peeks for today and to pick up today's cutting file FREEBIE! 

Don't forget to join us tomorrow for Day 2!

Here is today's freebie

Thursday, September 24, 2015

"Make It Merry" CTMH Stamp Set

Hi crafty friends! Today I am sharing two Christmas cards that I made for The Crafty Pickle Blog using Close to My Heart "Make It Merry" stamp set.

Here is my first card...


I used CTMH Artbooking Cricut Cartridge to cut my tag, which coordinates with this stamp set. I took CTMH Pear and Topiary Inks to stamp my image onto my tag (I tried to create an ombre effect, it's acutally a bit more noticeable in person). I cut a piece of vellum a bit smaller than my colored card stock and then tied some ribbon to my top panel before gluing it down to my card base.

I finished it off by adding a bell to a bow I tied, scattered a few TCP Relish Mix and popped my label on some foam adhesive to add a bit more dimension to my card. That is all for this card!


Now my next card is mimicking a card that I posted on my blog a few days ago. I loved how it turned out, I did make a few changes to make it a little different.

Here it is...


I took some stitched circle dies I have to cut my circles out of some pattern paper. I stamped my sentiment, also from "Make It Merry", onto some vellum with VersaMark and heat embossed it with some black embossing powder.

I drew some white lines and then glued my circles down, adding some dimension to 2 of them.  I scattered some tone on tone TCP Relish Mix to match with the pattern paper. Super easy and simple!


Well that is all for today! Thank you so much for stopping by!


Supplies used
Close to My Heart  "Make It Merry" stamp set
CTMH Pear and Topiary Inks